
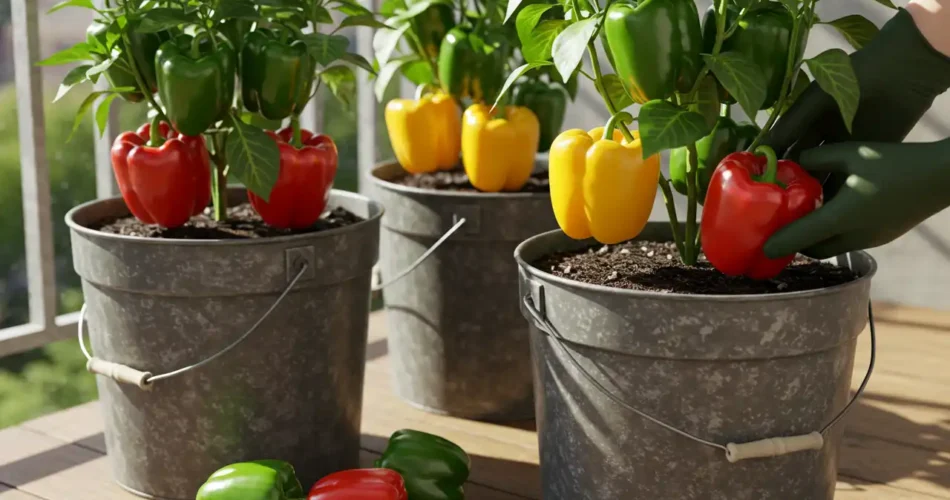
Hey there, fellow gardening enthusiasts! Who says you need a big garden to enjoy fresh, juicy bell peppers? Growing bell peppers in buckets is simple, cost-effective, and perfect for any space! Whether you’re an urban gardener with a tiny balcony or someone looking to maximize their backyard, this method works wonders.
Container gardening for bell peppers has become incredibly popular because it’s so convenient. Buckets are portable, allowing you to move your plants around to follow the sun or protect them from harsh weather. Plus, you have complete control over soil conditions, ensuring your peppers thrive no matter where you live.
From choosing the right bucket to harvesting plump, vibrant peppers, this guide will walk you through every step. Don’t let limited space stop you from enjoying homegrown goodness. Pin this article or share it with friends who love container gardening for bell peppers—it’s time to get started!
Table of Contents
Why Grow Bell Peppers in Buckets?
Growing bell peppers in buckets is a fantastic option for anyone short on space or looking to simplify their gardening routine. Whether you’re working with a patio, balcony, or even just a sunny windowsill, container gardening for bell peppers offers so many benefits that it’s hard not to love.
First off, buckets are incredibly versatile. They’re lightweight, affordable, and easy to store during the off-season. Plus, they make pest and disease management a breeze compared to ground planting. Since your plants aren’t directly in the soil, you reduce the risk of soil-borne diseases and critters like slugs or moles.
Another huge advantage? Portability. You can move your buckets around to follow the sun or bring them indoors during frosty nights. This level of control ensures your bell peppers stay happy and healthy all season long. And speaking of health, growing peppers in small spaces means you can tailor the soil conditions exactly to their needs—something that’s much harder to do in traditional gardens.
For beginners or those with limited outdoor space, bucket gardening is one of the easiest ways to start. With easy bell pepper gardening tips and a bit of patience, you’ll soon be enjoying juicy, colorful peppers right from your own containers. So why wait? Let’s dive into the specifics!
Step 1 – Choosing the Right Bucket
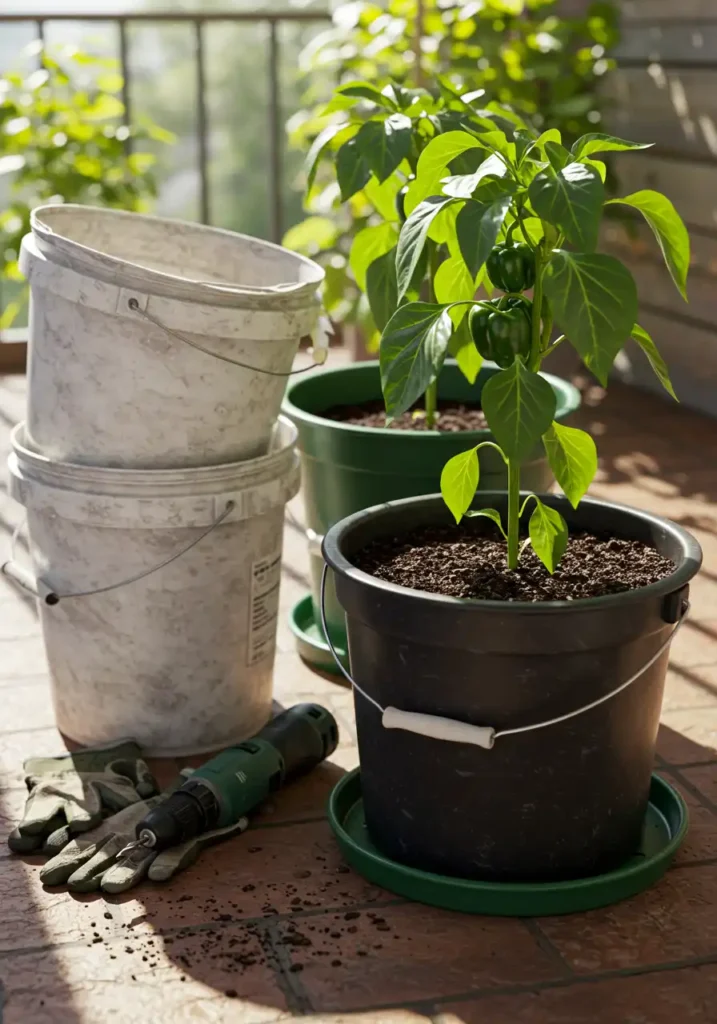
When it comes to growing bell peppers in buckets, size really does matter. Each plant needs enough room for its roots to spread out, so aim for buckets that hold at least 3–5 gallons of soil per plant. Smaller buckets might seem convenient, but they’ll restrict root growth and lead to stunted plants.
Drainage is key here. Drill several holes in the bottom of your bucket to prevent waterlogging, which can quickly kill your peppers. If you’re repurposing old food-grade buckets, make sure they’re clean and free of chemicals before planting.
As for materials, plastic buckets are lightweight and budget-friendly, but ensure they’re food-safe to avoid contamination. While ceramic or wooden containers look nice, they’re heavier and less practical for moving around. For successful container gardening for bell peppers, select a sturdy bucket that fits your available space—and don’t forget to add a saucer underneath to catch excess water!
Check more details in : Container Gardening: Bitter Herbs for Small Spaces
Step 2 – Preparing the Soil Mix
Now that you’ve got your bucket ready, let’s talk about the foundation of success: soil. Bell peppers thrive in well-draining, nutrient-rich soil, so skip the regular garden soil—it tends to be too heavy and compacted for containers. Instead, whip up a custom mix designed specifically for your pepper plants.
My go-to recipe includes equal parts potting soil, compost, and perlite. The potting soil provides structure, the compost adds nutrients, and the perlite ensures excellent drainage. If you want to give your peppers an extra boost, toss in some slow-release fertilizer or worm castings when mixing.
Here’s a pro tip: Avoid using soil straight from your yard unless it’s been tested for pH and nutrients. Bell peppers prefer slightly acidic soil (pH 6.0–6.8), so adjust accordingly if needed. When growing peppers in small spaces, investing in high-quality soil pays off big time. Your plants will thank you later!
check more information in : The Ultimate Guide to Growing Hydroponic Strawberries at Home
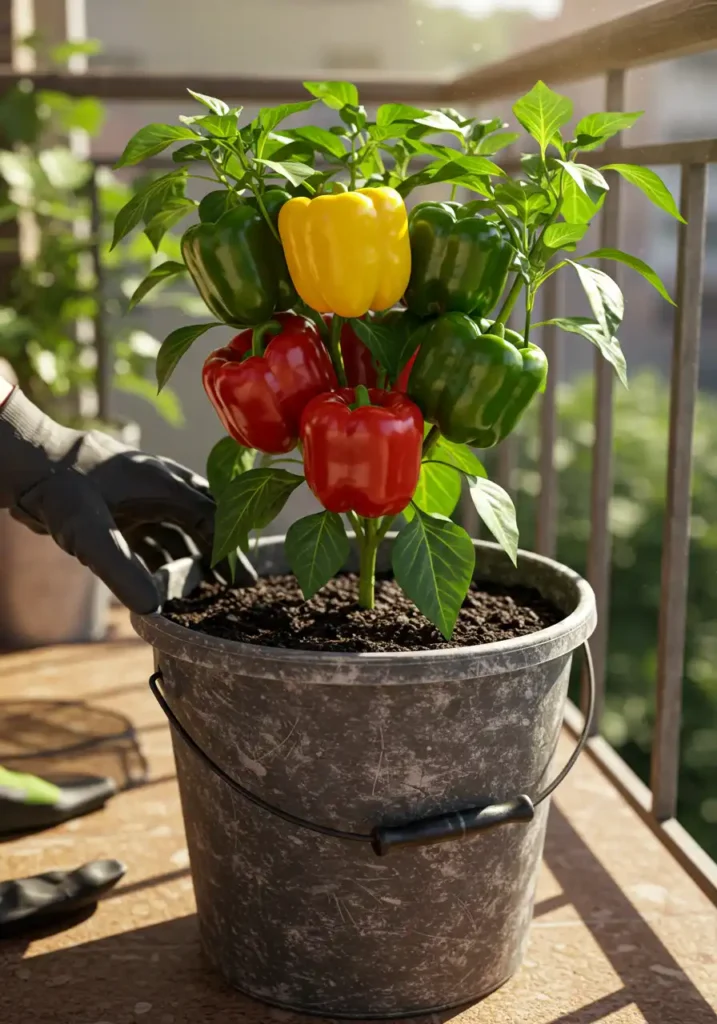
Step 3 – Selecting the Best Bell Pepper Varieties
Not all bell peppers are created equal—especially when it comes to container gardening. Some varieties are naturally more compact and better suited for buckets than others. Here are a few of my favorites:
- ‘Carmen’ Sweet Italian Pepper: Known for its rich flavor and vibrant red color, this variety matures early and produces large, thick-walled fruits.
- ‘Gypsy’ Hybrid Bell Pepper: A fast-growing, disease-resistant option with sweet yellow-green peppers that turn red when fully ripe.
- ‘Mini Bell’ Varieties: Perfect for small spaces, these bite-sized peppers come in a rainbow of colors and pack just as much flavor as their larger cousins.
When selecting seeds or seedlings, consider your climate zone and taste preferences. Compact or bushy varieties tend to perform best in containers because they don’t require as much vertical space. For best practices for growing bell peppers, opt for dwarf or bushy types suited to containers—you won’t regret it!
Step 4 – Planting and Care Tips
Alright, let’s get our hands dirty! Planting bell peppers in buckets is straightforward once you know the basics. Start by filling your bucket with your prepared soil mix, leaving about 1–2 inches of space at the top. Gently remove the seedling from its nursery pot and place it in the center of the bucket. Backfill with soil, pressing lightly to eliminate air pockets. Water thoroughly after planting—that’s crucial for settling the soil around the roots.
Now, onto care tips. Consistent watering is essential—bell peppers hate dry soil but also dislike soggy conditions. During hot summer months, you might need to water daily, especially if your bucket is exposed to direct sunlight. Mulching with straw or shredded bark helps retain moisture and keeps weeds at bay.
Fertilize regularly during the growing season (spring through early fall) with a balanced liquid fertilizer every 2–3 weeks. Follow package instructions carefully—you don’t want to burn the roots. With these tips, even beginners can master how to grow juicy bell peppers effortlessly. Easy peasy, right?
Never Miss : Boost Your Yellow Dragon Fruit Harvest: Advanced Techniques for Bigger And Juicier Crops
Step 5 – Pruning and Staking
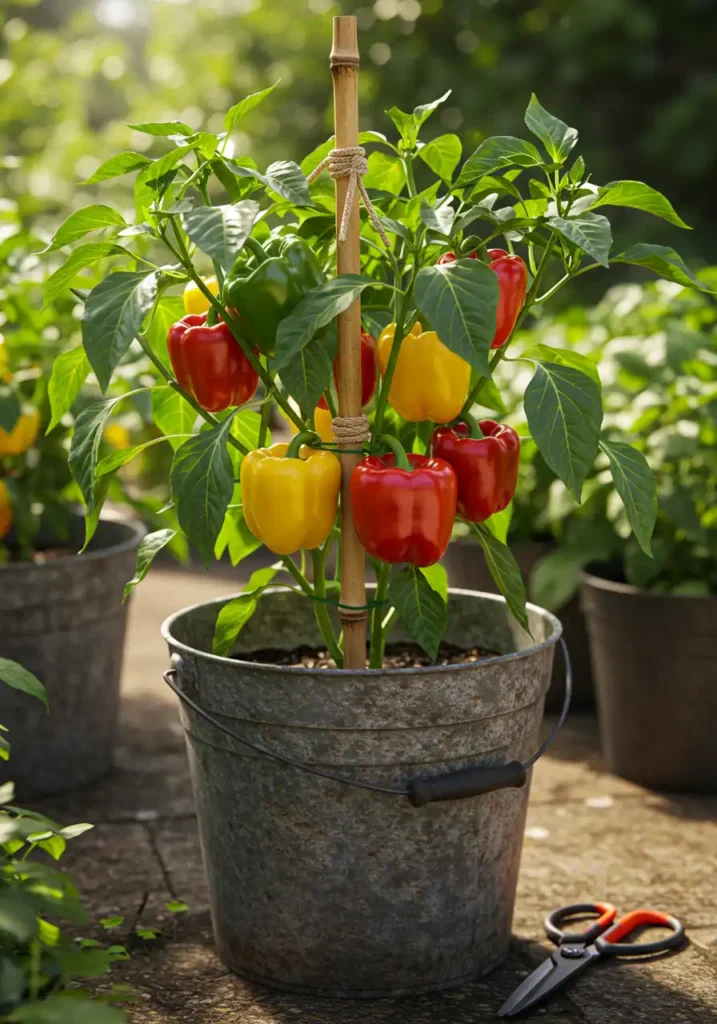
Pruning might sound intimidating, but trust me—it’s one of the best things you can do to ensure your bell peppers grow strong and productive. Regular maintenance keeps them healthy, bushy, and focused on producing juicy fruits instead of unnecessary foliage.
Start by removing suckers—those small shoots that form between the main stems. Pinching them off directs energy toward fruit production rather than leaf growth. If your plants start getting tall and leggy, consider staking or caging them for support. Heavy fruits can weigh down branches, causing breakage, especially during windy weather.
Here’s another tip: If your plant looks weak early in the season, pinch off any flowers that appear. This encourages stronger root development, leading to healthier plants later on. Don’t worry—you’ll still get plenty of peppers once the plant matures!
Proper pruning and staking ensure bountiful harvests year after year in your container gardening for bell peppers setup. It’s worth the effort, I promise!
check this for more details : Grow Great Juicy Blueberries in Containers: No Yard, No Problem!
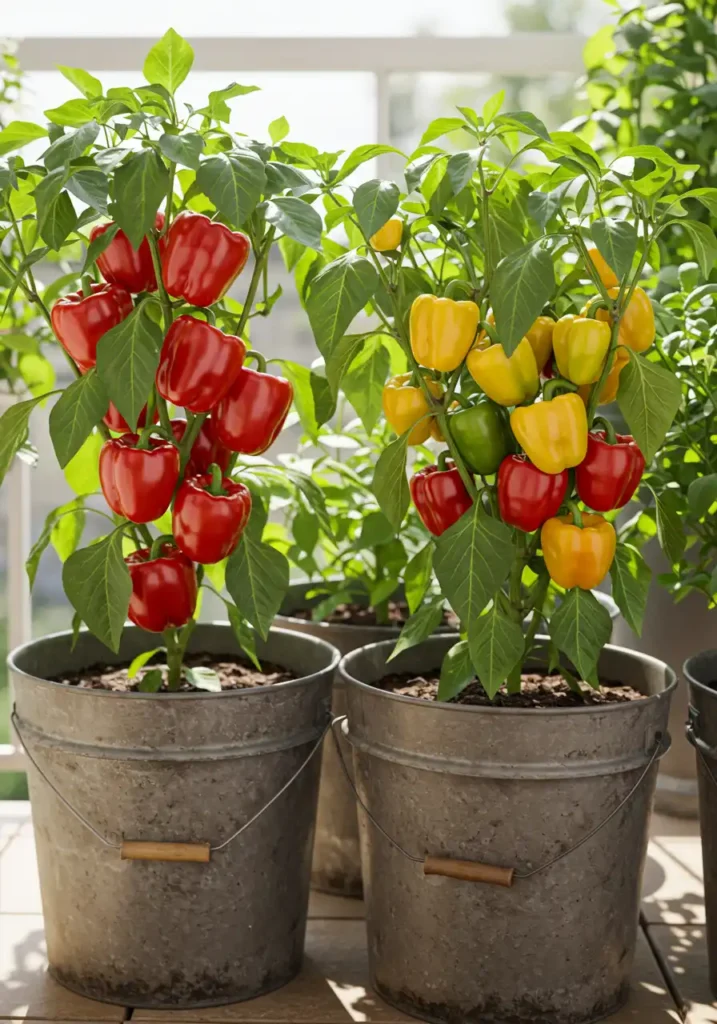
Harvesting Your Bell Peppers
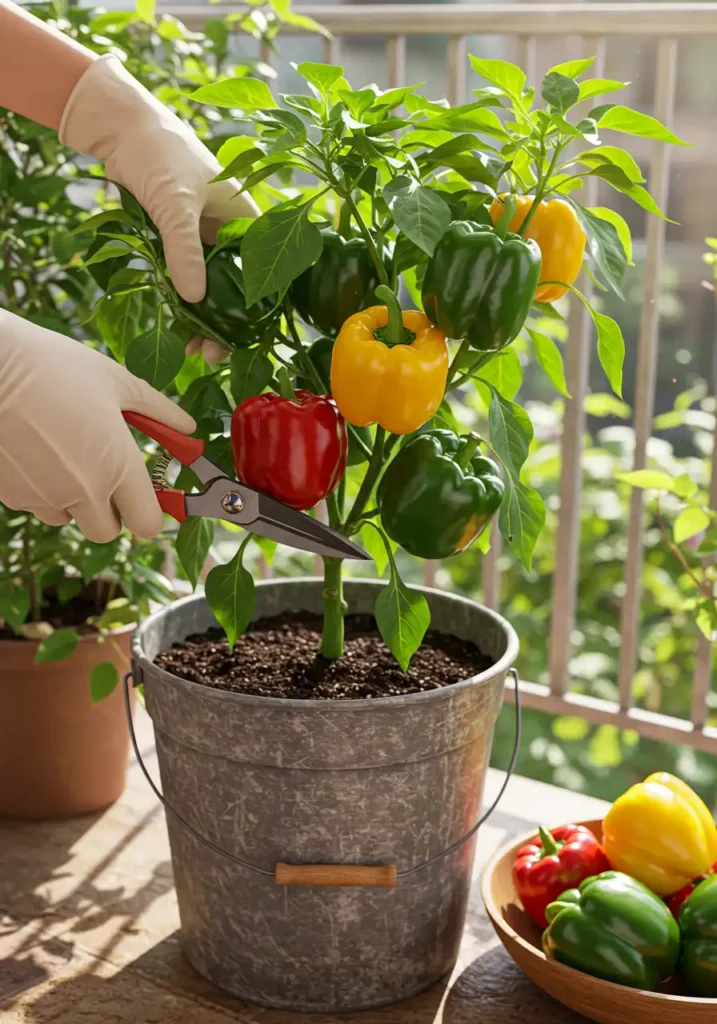
The moment we’ve all been waiting for—harvest time! There’s nothing quite like picking fresh, vibrant bell peppers straight from your own bucket. But how do you know when they’re ready? Here’s what to look for:
Wait until your peppers reach full size and develop their characteristic colors—green, red, yellow, or orange, depending on the variety. For sweeter peppers, let them stay on the plant longer. Did you know that leaving them to ripen fully increases their vitamin C content and natural sweetness?
When harvesting, use scissors or pruning shears to cut the peppers off gently. Avoid pulling them by hand, as this could damage the plant. And here’s a fun fact: The more peppers you pick, the more your plant will produce. So don’t be shy—pluck away!
Show off your homegrown treasures on social media and inspire others to try growing bell peppers in buckets. You’ll be proud of what you’ve grown!
Troubleshooting Common Issues
Even the most experienced gardeners run into problems sometimes, but don’t worry—most issues are easy to fix. Let’s tackle some common challenges you might face when growing bell peppers in buckets:
Pests: Aphids, spider mites, and whiteflies love pepper plants. Combat them with neem oil or insecticidal soap. A strong spray of water can also knock pests off leaves.
Diseases: Blossom end rot is a common issue caused by calcium deficiency or inconsistent watering. Add lime to the soil and water evenly to prevent it. Powdery mildew thrives in humid conditions—improve airflow by pruning crowded plants.
Nutrient Deficiencies: Yellowing leaves often indicate a lack of nitrogen. Test your soil regularly and adjust fertilization accordingly. Too much fertilizer, however, can lead to lush foliage but fewer fruits.
Remember, easy bell pepper gardening tips aren’t hard to follow. With a little care, even if issues arise, they’re manageable. You’ve got this!
Conclusion
And there you have it—everything you need to know about growing bell peppers in buckets! From choosing the right variety and soil to pruning and harvesting, container gardening for bell peppers is a rewarding journey that anyone can enjoy, no matter the size of your outdoor space. Don’t let limited room stop you from savoring fresh, homegrown bell peppers bursting with flavor.
With consistent care and a little patience, you’ll soon be enjoying plump, juicy peppers right from your patio or balcony. Save this article for future reference or share it with friends who love container gardening for bell peppers as much as you do!
Quick Answers to Your Bell Pepper Gardening Questions
Q1: Can I reuse the same bucket next year?
A: Yes, but clean it thoroughly with soap and water before replanting to prevent disease.
Q2: Do bell peppers need full sun when grown in buckets?
A: Absolutely! Aim for 6–8 hours of direct sunlight daily for optimal growth and fruit production.
Q3: How often should I water my bucket-grown bell peppers?
A: Water deeply once or twice a week, depending on weather conditions. Keep the soil consistently moist but not soggy.
Q4: Can I grow multiple bell peppers in one bucket?
A: It’s best to stick to one plant per bucket to ensure adequate space and nutrients. Overcrowding can lead to stunted growth.
Q5: Why are my bell peppers turning black at the bottom?
A: This could be blossom end rot, caused by calcium deficiency or inconsistent watering. Add lime to the soil and water evenly to fix the issue.
